We took a break from our focus on film to do something a little less structured. Our bathrooms were in need of some visual enhancement so we decided to make some murals for them. Instead of painting directly on the wall we used some of the large white rolls of paper that we have. We used tempera paint and collage elements. The lining we did with paint pen.
As far as planning, the children drew individual images on paper and then when it came time to do the mural they all just picked a spot and began replicating what they'd drawn. In some cases we used an opaque projector or overhead projector to copy the images exactly. Some people just freehanded it. The drawings were first done in pencil to be certain of what they wanted and where. Then, they outlined that in black pen. Next, paint was added and our aim was to have every bit of paper covered by paint. This basic trait is often the key to a child's art piece having a finished look, in my opinion. While my ultimate goal is to have the children have complete control over the final piece we did allow ourselves to go in at the end to do the outlining. It was a wonderful collaboration, I'd say.
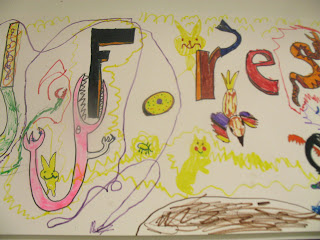
The kids chose the two themes of: The Natural World and The Mystical Forest. They divided themselves up into groups based on what sounded interesting to them. Here, I will allow the pictures to speak for themselves. I really enjoy the detail.


As far as planning, the children drew individual images on paper and then when it came time to do the mural they all just picked a spot and began replicating what they'd drawn. In some cases we used an opaque projector or overhead projector to copy the images exactly. Some people just freehanded it. The drawings were first done in pencil to be certain of what they wanted and where. Then, they outlined that in black pen. Next, paint was added and our aim was to have every bit of paper covered by paint. This basic trait is often the key to a child's art piece having a finished look, in my opinion. While my ultimate goal is to have the children have complete control over the final piece we did allow ourselves to go in at the end to do the outlining. It was a wonderful collaboration, I'd say.
The kids chose the two themes of: The Natural World and The Mystical Forest. They divided themselves up into groups based on what sounded interesting to them. Here, I will allow the pictures to speak for themselves. I really enjoy the detail.
The Natural World


The Mystical Forest


